Acho que já comentei por aqui que adoro tortas de todo tipo. Cresci com a torta de brócolis e milho da Nana. Coisa linda! Massa crocante, recheio cremoso e cheio de sabor (aliás, essa torta merece um post só pra ela).
Como parei de comer carne aos 7 anos e minha mãe já era vegetariana há algum tempo, os pratos principais por lá nunca eram a carne. No máximo um peitinho de frango grelhado lá no canto rs. A estrela da mesa era sempre uma massa, uma torta, um assado de vegetais.
A maravilha de tortas é poder escolher o tipo de massa, os ingredientes e suas combinações, a estrutura… Nada é impossível. O importante é não fazer o recheio úmido demais. Ninguém quer um fundo de torta empapado ;-)
Essas tortinhas da Lady and Pups são incríveis! Estou de olho nelas há meses. Resolvi experimentar, adaptando aos ingredientes que encontrei. E que resultado… Nham!
Eu imitei a Mandy e fiz o dobro do recheio. Gostei da ideia de usar como molho para macarrão! A receita abaixo usa somente o necessário para as tortas.
Ingredientes para a massa:
- 2 xícaras de farinha de trigo
- 200g de manteiga cortada em cubinhos – congelada
- 1 colher de sopa de gorgonzola
- 100g de queijo frescal (ou o que você preferir!)
- 1 pitada de sal
Ingredientes para o recheio:
- ½ brócolis
- 1 colher de sopa de óleo
- 2 colheres de sopa de gorgonzola
- ¼ xícara de queijo parmesão
- 75g de cream cheese
- 1 dente de alho batido com sal
- 1 ovo para pincelar (bata com uma colher de água)
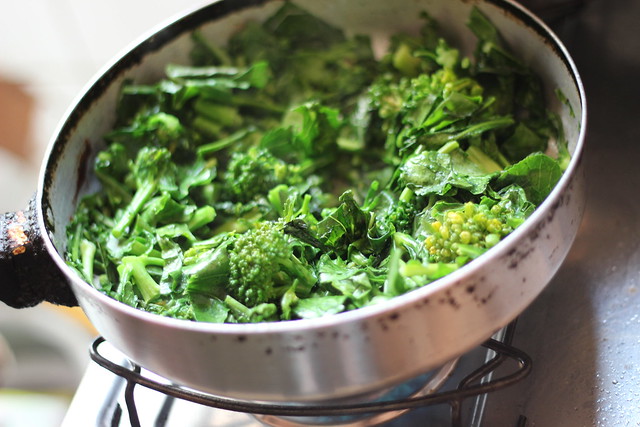
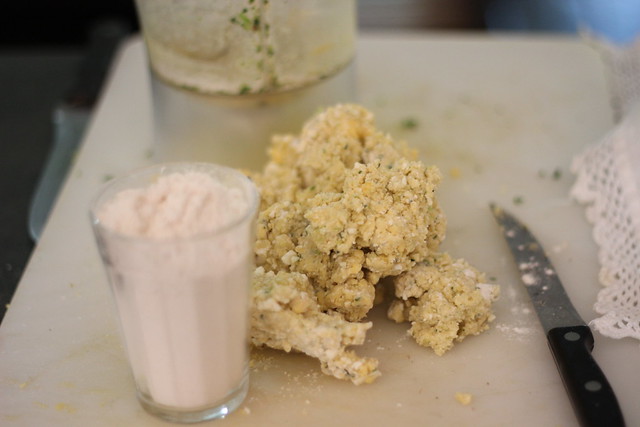
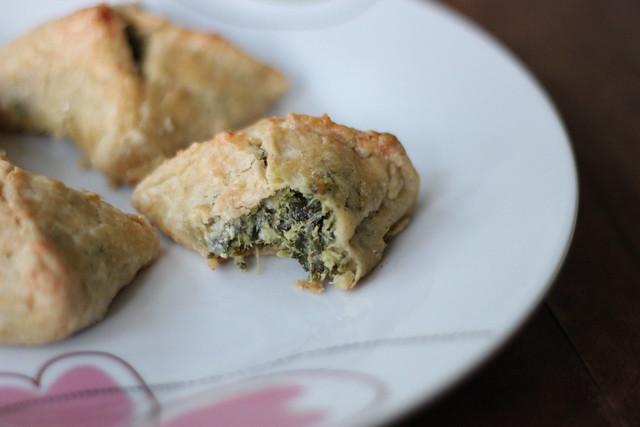
Lave o brócolis e pique em pedaços. Refogue em uma frigideira com o alho, o sal e o óleo. Retire do fogo quando os talos começarem a ficar tenros.

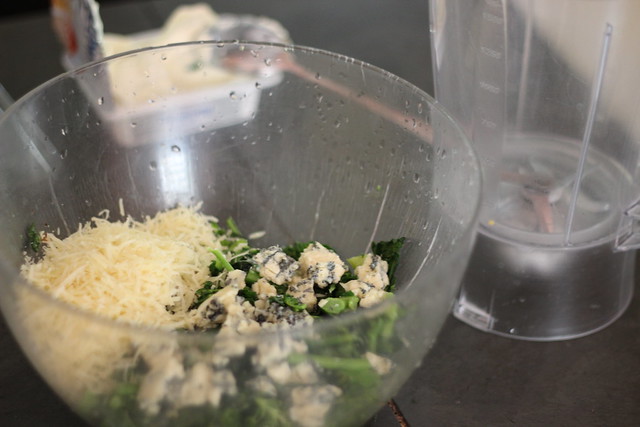
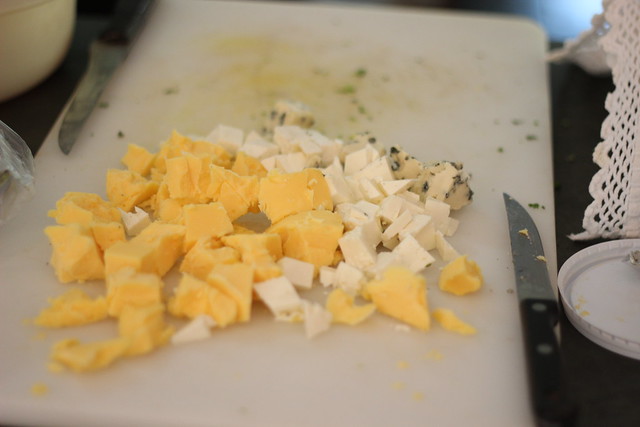
Em um processador ou liquidificador, bata bem o brócolis e os queijos e confira o tempero. Coloque na geladeira e deixe por 1 hora.

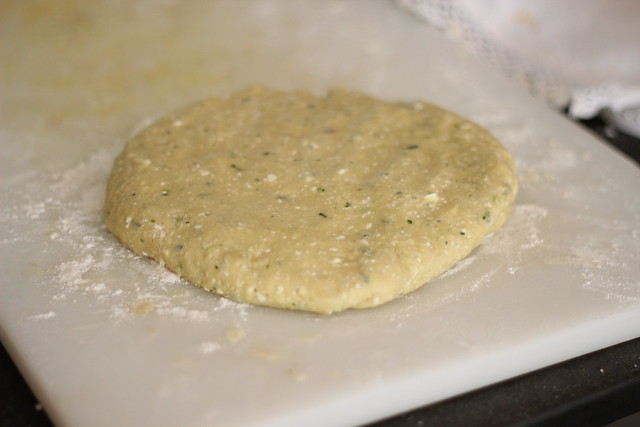
Para fazer a massa, bata metade da farinha de trigo (1 xícara) com a manteiga e os queijos em um processador ou liquidificador (isso é muito mais fácil de fazer com o processador, mas não é todo mundo que tem um em casa, né?). Bata até atingir uma consistência mais homogênea. Junte o restante da farinha e misture novamente (fiz essa parte na mão mesmo. Meu liquidificador não ia aguentar). Caso seja necessário, coloque um pouco de água na massa para dar liga. Não coloque mais do que 2 colheres de sopa!
Sove a massa levemente e amasse, formando um disco. Enrole em plástico-filme e leve ao congelador por 30 minutos (caso não vá fazer a torta na hora, deixe a massa na geladeira).
Ligue o forno a 200°C.
Abra a massa em uma superfície coberta de farinha. Faça um retângulo, deixando a massa com a espessura aproximada de 4mm. Se você precisar cortar as beiradas, junte-as depois, abra e faça mais tortinhas.

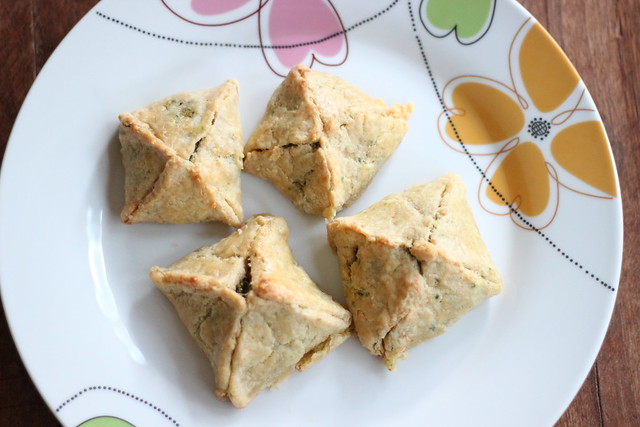
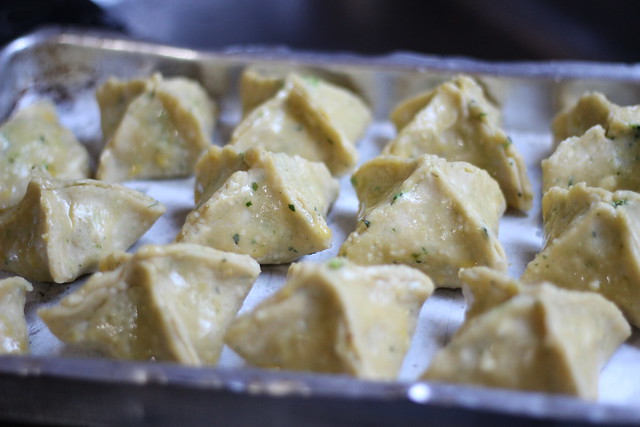
Corte a massa em quadrados. Nessa hora você pode escolher o tamanho das suas tortinhas. Os meus quadrados tinham lados de aproximadamente 9cm. Coloque uma colher de sopa cheia de recheio em cada pedaço de massa.
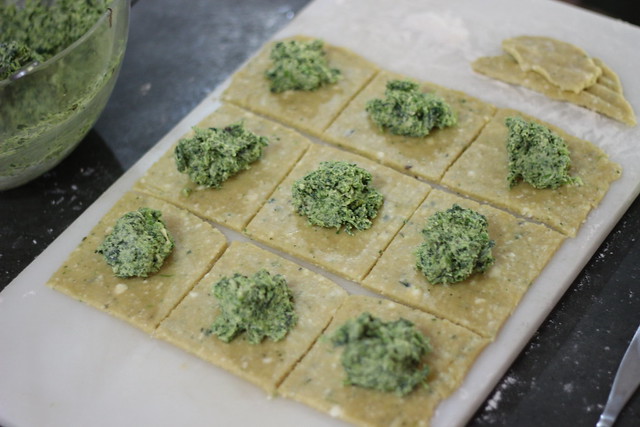
Eu mudei o formato das tortinhas, que ficaram parecendo esfihas. Junte as quatro pontas de um quadrado no centro e cuidadosamente feche a torta. Repita em cada pedaço de massa.

Unte uma forma e espalhe farinha por cima. Espalhe as tortinhas na forma, deixando algum espaço entre elas (as minhas ficaram um pouco juntas demais). Leve a forma à geladeira por 1 hora ou ao freezer por 30 minutos.
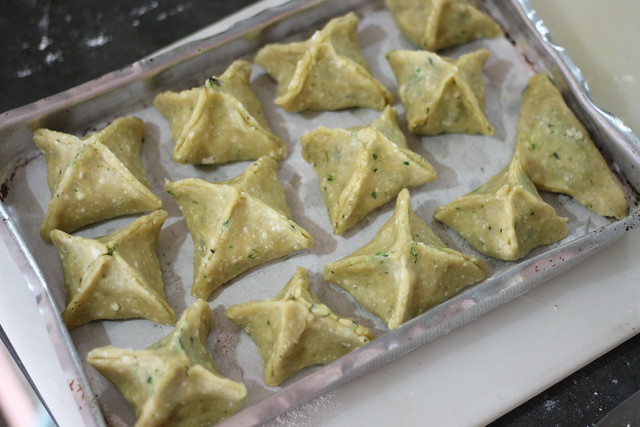
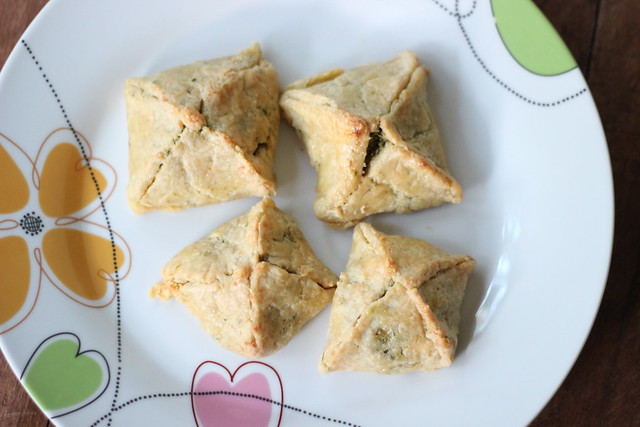
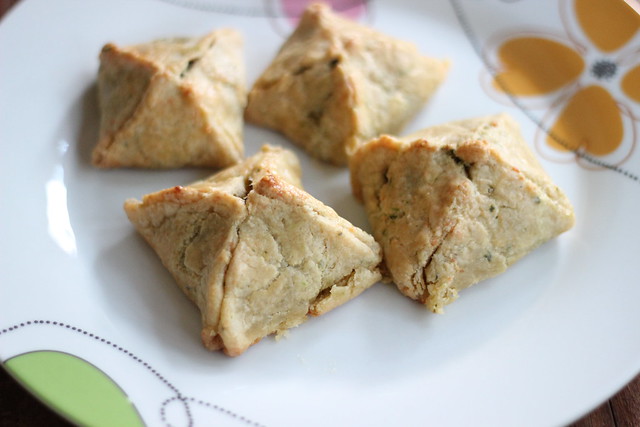
Retire a forma e pincele cada tortinha com o ovo batido. Leve ao forno por 30 a 45 minutos, ou até a massa atingir uma cor dourada.
A Mandy polvilha açúcar de confeiteiro por cima e serve com mostarda. Fica a seu critério. O importante é servir as tortinhas ainda mornas. Aproveite!
Essa receita rende 15 tortinhas.
—
I think I already mentioned here that I love pies. I grew up eating a broccoli and corn pie that Nana makes. It’s beautiful. The crust is crunchy, the filling is creamy and full of flavor (by the way, this pie deserves its own post!).
Since I stopped eating meat at 7 and my mother was already a vegetarian, the main dishes at home were never the meat. At the most a chicken breast on the side. The star of the table was always a savory pie, some pasta or a vegetable roast.
The wonderful thing about pies is being able to choose the kind of pastry, the ingredients and combinations, the structure… Nothing is impossible. The important part is not making the filling too humid. Nobody likes a soggy bottom ;-)
These hand pies by Lady and Pups are amazing! I’ve had my eyes on them for months. I decided to give them a try using the ingredients that I found. And what a result… Yum!
I also copied Mandy and made the double amount of filling. I liked the idea of using it to eat with pasta! The recipe below gives you just enough for the pies.
Ingredients for the crust:
- 2 cups of flour
- 200g of butter cut into little cubes – frozen
- 1 tablespoon of blue cheese
- 100g of fresh minas cheese (or whatever type you want!)
- 1 pinch of salt
Ingredients for the filling:
- ½ broccoli
- 1 tablespoon of oil
- 2 tablespoons of blue cheese
- ¼ cup of parmesan cheese
- 75g of cream cheese
- 1 garlic clove – smashed with salt
- Egg wash (1 egg whisked with 1 tablespoon of water)
Wash the broccoli and chop it into pieces. Stir fry it on a pan with the garlic and salt and the oil. Remove from the heat once the stems start getting tender.
On a blender or food processor, ground the broccoli and 3 types of cheese. Check the seasoning. Leave it in the fridge for 1 hour.
To make the pastry, mix half the flour (1 cup) with the butter and 2 types of cheese using a food processor or blender (this is much easier to do on a food processor, but not everyone has one at home, right?). Mix until it reaches an almost smooth consistency. Add the rest of the flour and mix again (I did that part by hand. My blender was just not strong enough for that). In case the dough is too dry, add a little water. Don’t add more than 2 tablespoons of water!
Knead the dough slightly and flatten it, making a disk. Wrap it in cling film and take it to the freezer for 30 minutes (in case you’re not making the pie at the time, leave it in the fridge).
Turn the oven on at 200°C.
Roll out the dough on a clean surface covered with flour. Make a rectangle, leaving the dough with about 4mm thickness. You might need to cut the trimmings. Later, you can gather them, roll them out and make more pies.
Cut the dough into squares. Mine had about 9cm on each side. Put a tablespoon of filling on each square.
I changed the shape of the pies, which ended up looking like sfihas. Bring the four corners to the center and close the sides. Repeat that with each square.
Grease a baking tray and spread some flour on it. Place the pies on the tray, leaving some room to grow (mine were a bit too close to each other). Take the tray to the fridge for 1 hour or to the freezer or 30 minutes.
Remove the tray and brush each pie with the egg wash. Take them to the oven for 30 to 45 minutes or until golden on the sides.
Mandy dusts the hand pies with powder sugar and serves them with mustard. That is up to you. The important thing is to serve them still warm. Enjoy!
This recipe yields 15 hand pies.
