Pão de banana e chocolate / Chocolate chip banana bread

* Scroll down for the English version!

Eu não tenho muita experiência com pães. Já fiz alguns aqui para o blog, mas como as receitas costumam ser bem demoradas, não crio coragem com tanta frequência rs.

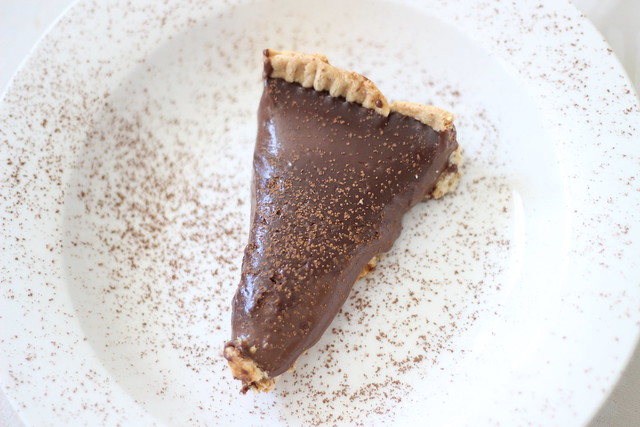
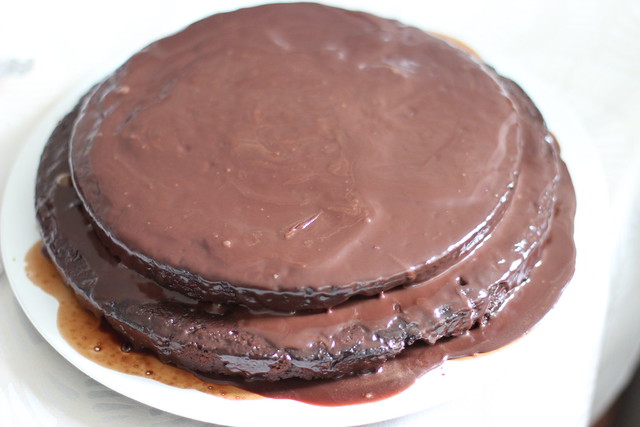
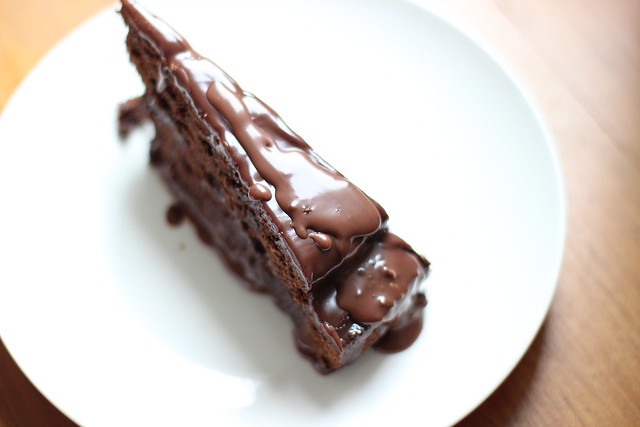
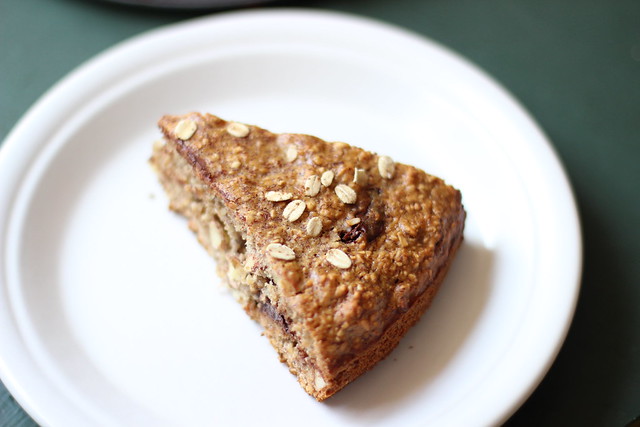
Esse pão desafia todos os meus conceitos sobre a arte panificadora. Considerei chamar de bolo, mas o sabor realmente não é o mesmo, já que o produto final não é tão doce. Trata-se simplesmente de um pão incrivelmente fácil de fazer (sério, é impossível dar errado!) e absolutamente delicioso! Levei um pedaço para o trabalho e pessoal quis levar pra casa ;-)

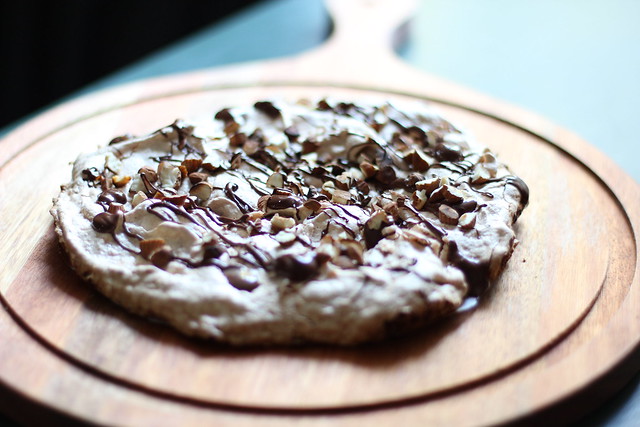
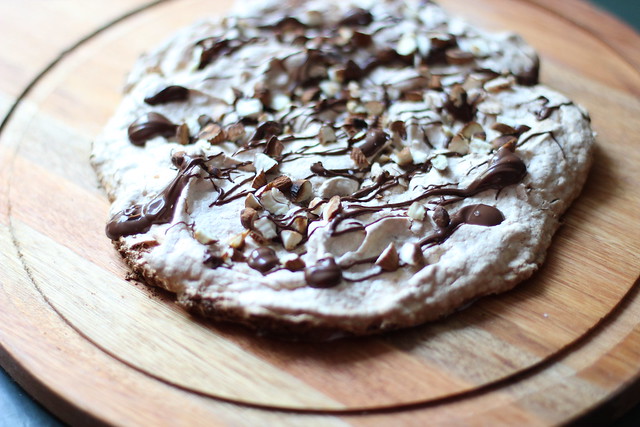
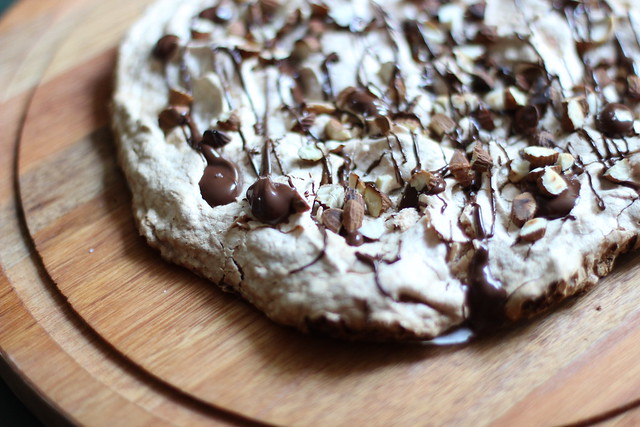
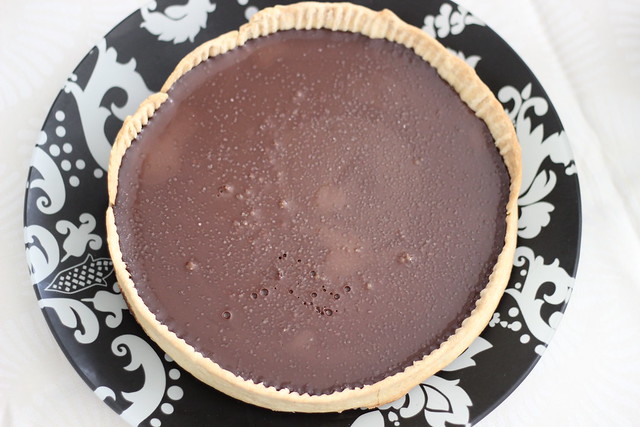
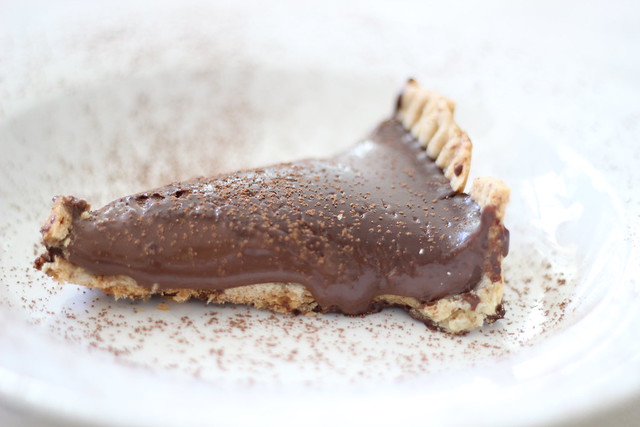
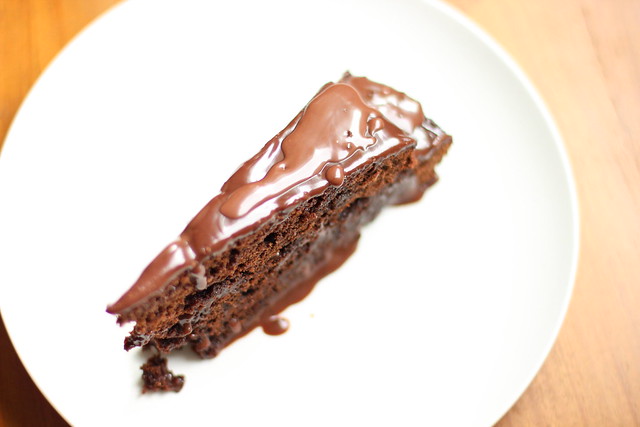
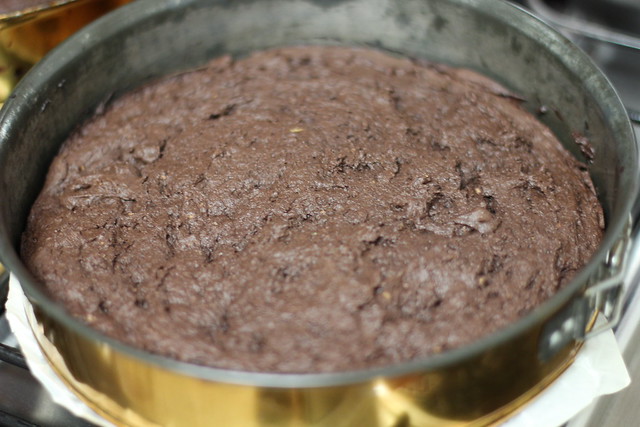
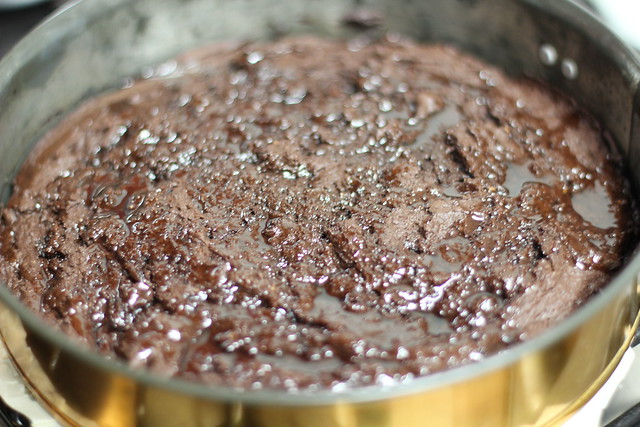
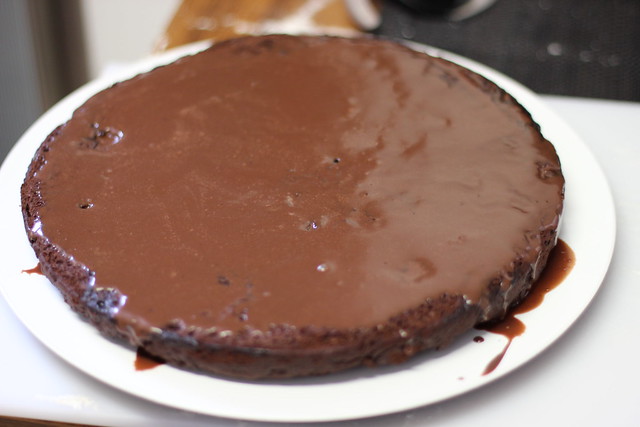
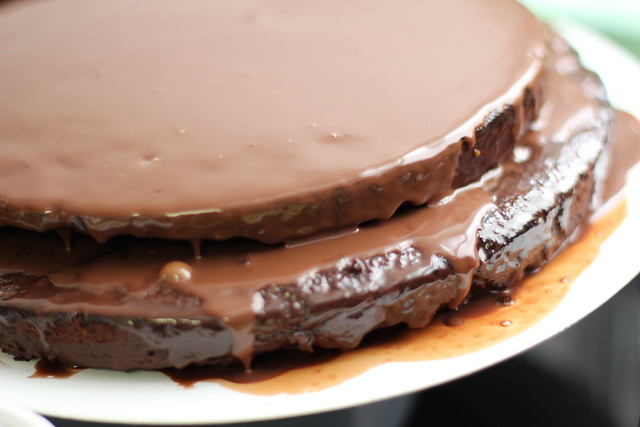
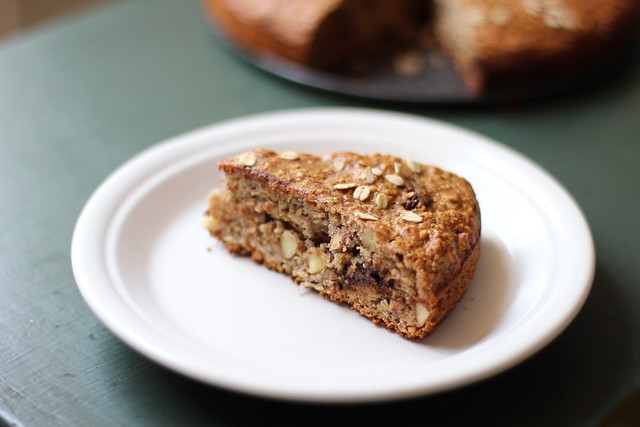
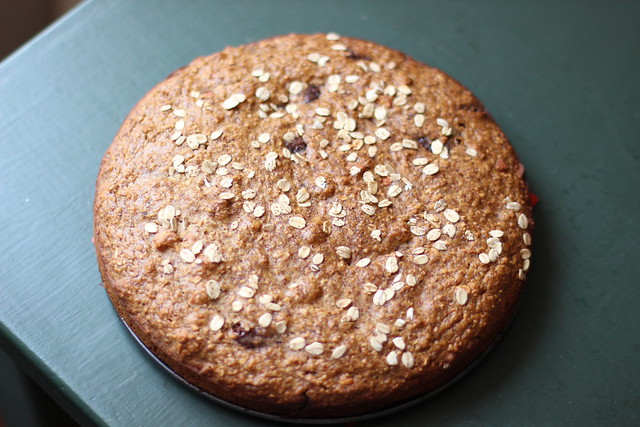
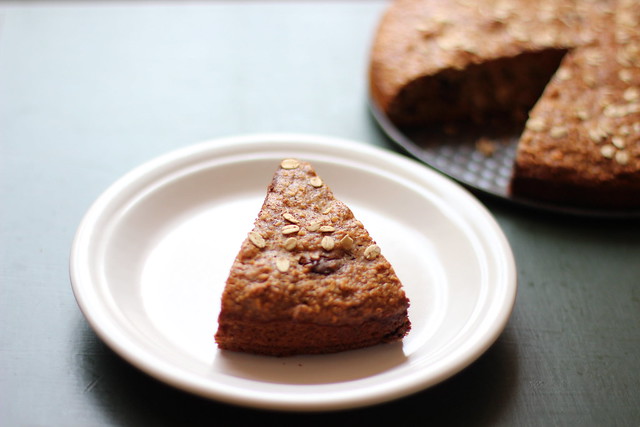
O tabuleiro que eu usei não é o mais apropriado para pães, mas era o que eu tinha em casa. Eu usaria uma assadeira de pão de forma, ia ficar mais bonito. A receita original do blog Naturally Ella foi feita em uma dessas e ficou ótimo! Mas o meu baixinho ainda ficou lindo, olha!

Ingredientes:

  • ¾ xícara de aveia
  • 1 xícara de farinha de trigo (branca ou integral)
  • 1 colher de chá de bicarbonato de sódio
  • ½ colher de chá de sal
  • ½ xícara de amêndoas ou castanhas picadas
  • 1 xícara de chocolate meio amargo picado (use gotas ou uma barra de 150g)
  • 3 bananas
  • ¾ xícara de mel
  • 3 colheres de sopa de azeite
  • 2 ovos
  • Aveia para enfeitar

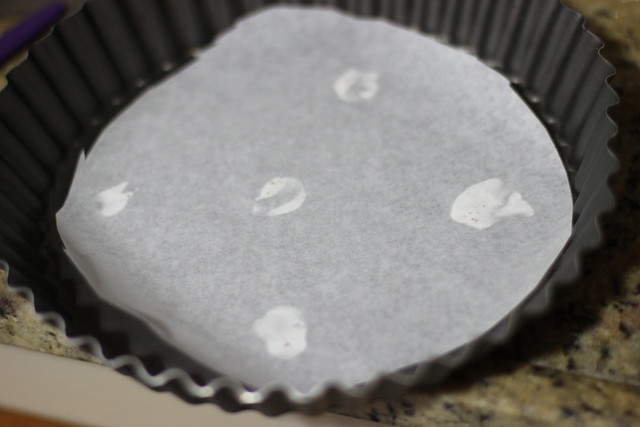
Ligue o forno a 180ᵒC e unte uma forma de pão.

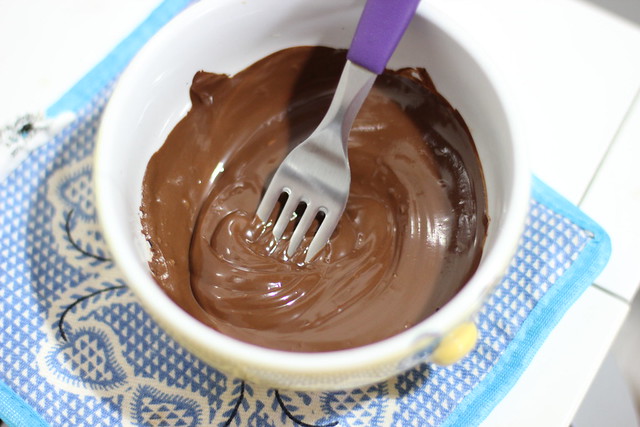
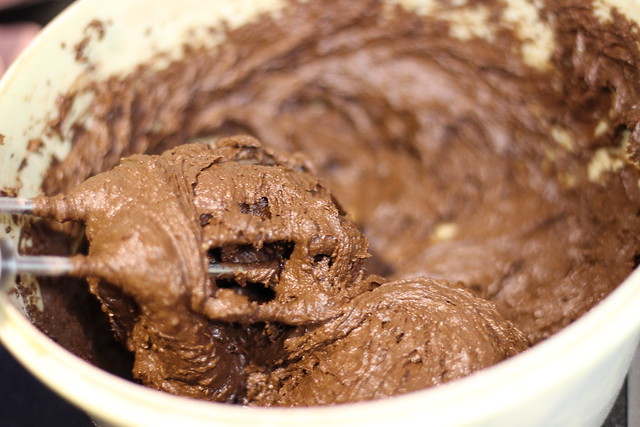
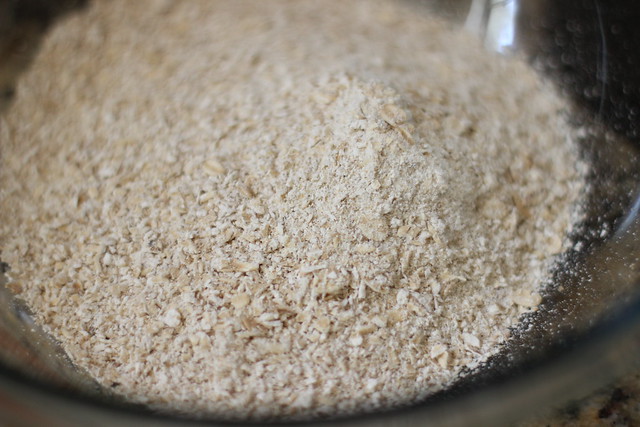
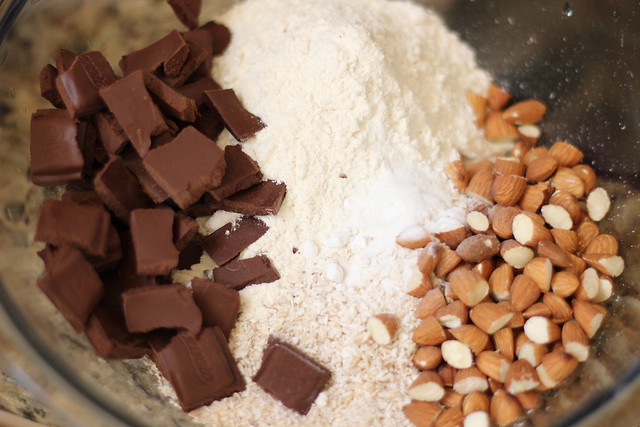
Bata a aveia no liquidificador ou em um processador de alimentos até atingir uma consistência de farinha, mas com alguns pedaços. Misture com a farinha de trigo, o bicarbonato, as amêndoas e o chocolate.

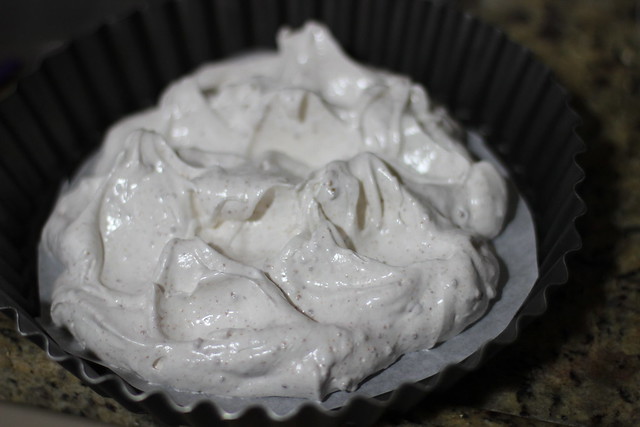
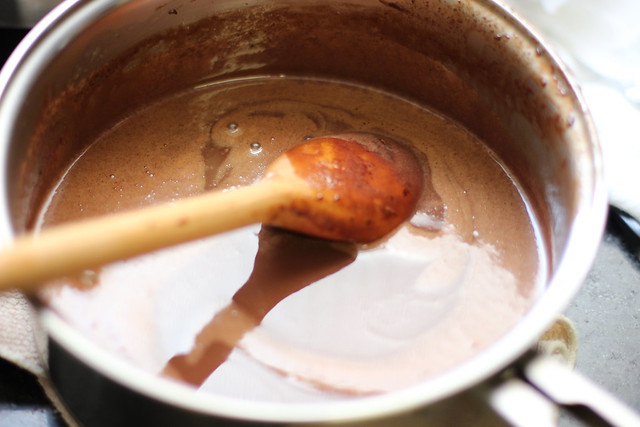
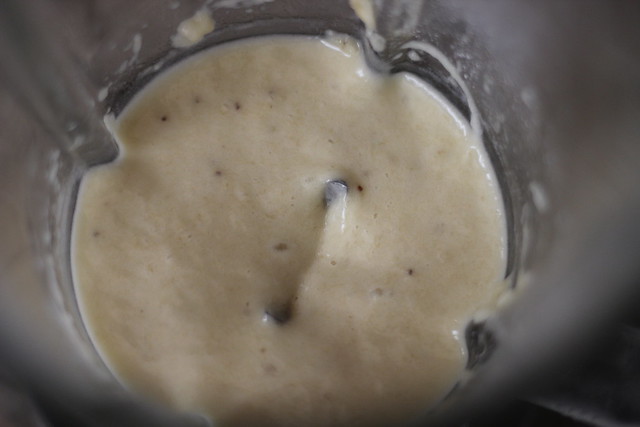
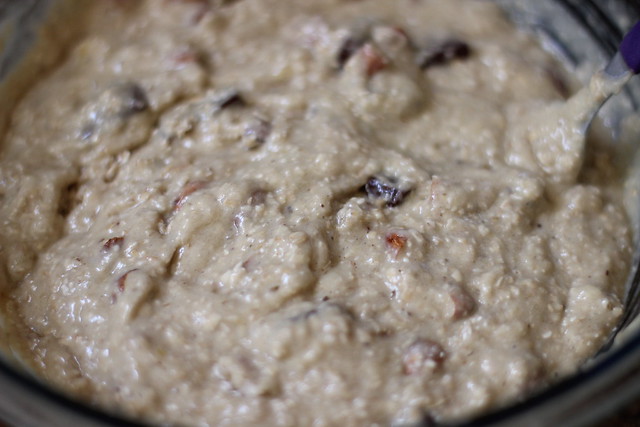
Bata as bananas no liquidificador até virarem um purê homogêneo. Junte com o mel, o azeite e os ovos. Junte essa mistura com os ingredientes secos. Misture sem bater.

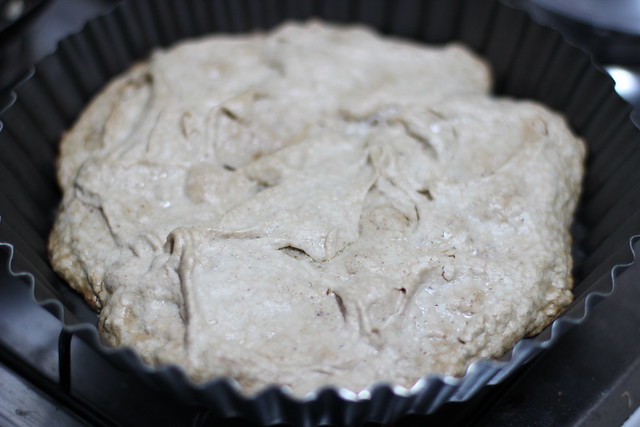
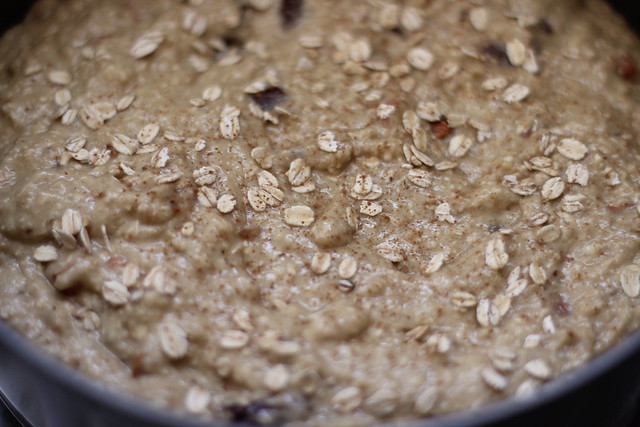
Despeje a massa na forma e espalhe um pouco de aveia por cima, para enfeitar. Asse por aproximadamente 60 minutos, ou até o topo dourar. Para conferir, enfie um palito de dente no centro. Caso ele saia limpo, o pão está pronto. Deixe esfriar antes de servir.

Essa receita serve 8 pessoas.

I don’t have much experience with bread. I’ve made a few tries for the blog, but as the recipes are quite complicated and take a long time to make, I don’t make them often.

This bread challenges all my preconceived notions about bread baking. I considered calling it cake, but the flavor is really not the same, since the result is not so sweet. It’s simply an incredibly easy bread to make (seriously, it’s impossible to go wrong!) and absolutely delicious! I brought a piece to work and everyone went crazy about it ;-)

I didn’t use an appropriate loaf pan, because I didn’t have one. I strongly suggest it, though, because it looks great. The original recipe from Naturally Ella was made in one of those and it turned out gorgeous! But mine was quite cute as well!

Ingredients:

  • ¾ cup of oats
  • 1 cup of flour (white or whole wheat)
  • 1 teaspoon of baking soda
  • ½ teaspoon of salt
  • ½ cup of chopped almonds or nuts
  • 1 cup of dark chocolate chips (I chopped a 150g bar into chunks)
  • 3 bananas
  • ¾ cup of honey
  • 3 tablespoons of olive oil
  • 2 eggs
  • Oats to garnish

Turn the oven on at 180ᵒC and grease a loaf pan.

Grind the oats using a food processor or blender until they reach a flour-like consistency. It’s fine to have larger pieces. Mix with the wheat flour, the baking soda, the nuts or almonds and chocolate.

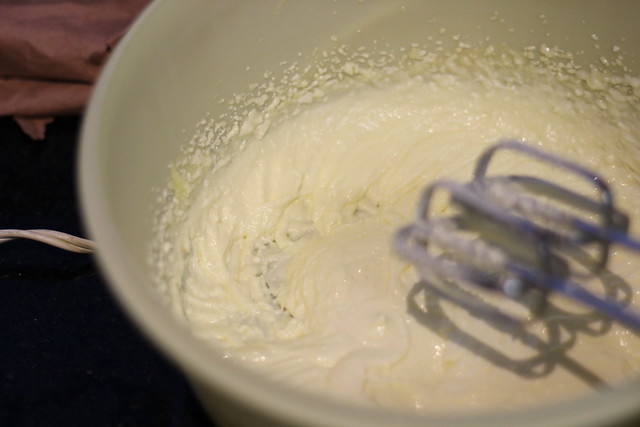
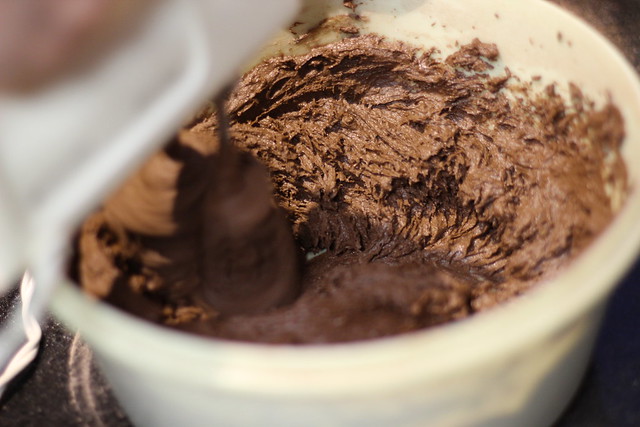
Blend the bananas until creamy and smooth. Add the honey, olive oil an eggs. Add this mixture to the dry ingredients and stir gently.

Pour the batter on the pan and sprinkle a few oats on top. Bake for about 60 minutes or until the top is golden. If you want to check, stick a toothpick in the center. If it comes out clean, the bread is ready. Let it cool before cutting.

This recipe serves about 8 people.

Suspiro de amendoim com chocolate / Peanut meringue with chocolate

* Scroll down for the English version!

Eu nunca fui muito fã de suspiro. A minha mãe tem uma expressão para esse tipo de doce que é gostoso, mas não é lá grandes maravilhas: desperdício de calorias ;-) Em uma família em que todo mundo sofre com a balança, a gente tem que escolher bem as sobremesas favoritas rs. E suspiro nunca esteve lá na minha lista.

Até que eu comi um diferente. Eu nunca entendi a paixão dos ingleses por suspiro até aquele dia. O chef do restaurante/pousada onde eu trabalhava misturou avelãs torradas e moídas com as claras e depois de pronto, decorou com uma calda de chocolate. E eu me apaixonei perdidamente.

Esse post é uma homenagem àquele dia e é uma chance de me redimir com o suspiro. Usei como base uma receita do Jamie (linda e bem mais complexa, por sinal) e adaptei para os ingredientes que tinha em casa.

Suspiro do meu coração, diz que me perdoa!

Ingredientes:

  • 3 claras de ovo
  • 7 colheres de sopa de açúcar de confeiteiro
  • 2 colheres de sopa de amendoim torrado e moído (ou avelãs)
  • 3 colheres de sopa de amêndoas (ou avelãs) picadas e torradas
  • 70g de chocolate picado (aproximadamente meia barra – usei meio amargo)
  • 1 pitada de sal
  • 1 pitada de flor de sal

Ligue o forno a 180°C e cubra um tabuleiro grande com papel manteiga.

Em uma vasilha limpa, bata as claras de ovo em picos firmes usando uma batedeira. Não deixe cair água, gema, cascas de ovos ou nenhuma outra impureza nas claras. Adicione o sal e vá colocando o açúcar lentamente, colherada por colherada, enquanto continua batendo. O resultado final é brilhante e os picos são bem estáveis. O açúcar não estará mais granulado. Adicione o amendoim (ou avelã) torrado e moído na mistura e bata mais um pouco.

Coloque uma gotinha da mistura de clara nos cantos do papel manteiga, como se fosse uma cola. Vire de cabeça para baixo e grude no tabuleiro. Despeje as claras no tabuleiro, em cima do papel e faça picos da forma como preferir. Asse por 1 hora, até atingir uma consistência firme no exterior. O interior deve ser macio e delicioso.

Caso as amêndoas (ou avelãs) ainda não estejam torradas, toste-as em uma frigideira por alguns minutos, mexendo sempre. Tome cuidado para não queimar.

Pique o chocolate em pedaços e derreta em uma panela ou no micro-ondas.

Retire o suspiro do forno e deixe esfriar. Coloque-o no prato ou tábua onde for servir. Espalhe as amêndoas picadas e torradas em cima e enfeite com o chocolate derretido. Polvilhe com a flor de sal.

Essa receita serve 6 pessoas.

I was never much of a fan of meringue. My mother has an expression for the kind of dessert that is nice, but really that big a deal: waste of calories ;-) In a family in which everyone has trouble with their weight, we have to choose our sweets very carefully. And meringue was simply never on my list.

Until one day I tried a different one. Here in Brazil we usually eat them very small, crispy and bland. So I never really understood why the British love it so much until that day. The chef of the restaurant/inn where I worked mixed ground hazelnuts with the egg whites and decorated everything with dark chocolate. And that was it. I was madly in love.

This post pays homage to that day and gives me a chance to redeem myself with meringue. I used a recipe by Jamie (which is beautiful and much more complex and sophisticated, in fact) as a base and changed the ingredients for what I had at home.

My dearest meringue, say you forgive me!

Ingredients:

  • 3 egg whites
  • 7 tablespoons of icing sugar
  • 2 tablespoons of toasted and ground peanuts (or hazelnuts)
  • 3 tablespoons of almonds (or hazelnuts) – toasted and chopped
  • 70g of chocolate – chopped (I used bittersweet)
  • 1 pinch of salt
  • 1 pinch of fleur de sel

Turn the oven on at 180°C and cover a large baking tray with parchment paper.

In a clean bowl, whisk the egg whites until they make firm peaks. Do not let any water, yolk or any impurity fall on the egg whites. Add the salt and slowly whisk in the sugar, one spoon at a time. The result should be glossy and firm. The sugar should not be grainy anymore. Add the toasted ground peanuts (or hazelnuts) in the mixture and whisk until incorporated.

Place a drop of the mixture on each corner of the parchment paper, using it as glue. Turn it upside down and stick it to the tray. Pour the egg whites on the tray, on top of the paper and make peaks, shaping them as you prefer. Bake for 1 hour, until crispy outside. The interior will be chewy and delicious.

In case the almonds (or hazelnuts) are still not toasted, do that now on a frying pan for a few minutes, stirring often. Be careful not to let them burn.

Chop the chocolate into pieces and melt it on a pan or microwave.

Remove the meringue from the oven and allow it to cool. Place it on the plate or board in which it will be served. Spread the toasted chopped almonds on top and decorate with the melted chocolate. Sprinkle with fleur de sel.

This recipe serves 6 people.

Tarte de chocolate / Chocolate tart

* Scroll down for the English version!

Quem por aí já comeu chocolate com sal? Pode parecer absurdo à primeira vista, mas pense à respeito… o sal é um realçador de sabor. O sabor do chocolate é incrível. Realçar a maravilha que é o chocolate é pura mágica! E de quebra, não fica enjoativo, por não ser muito doce. Acreditem em mim, chocolate com sal é coisa linda!

Essa receita é do Jamie Oliver. Fiz há um tempo e tive um problema com a receita porque confundi o creme de leite. Então não repitam o meu erro! Esse tarte pede creme de leite FRESCO e não dá pra substituir por outro. O creme de leite normal não adquire aquela consistência mais firme com o tempo, diferente do fresco, que depois de aquecido firma bem.

Mas é só isso. A receita é bem fácil. E fica uma delícia! Divirtam-se!

Ingredientes para a massa:

  • 125g de farinha de trigo
  • 1 pitada de sal
  • 55g de manteiga – congelada cortada em cubos
  • 2 a 3 colheres de sopa de água gelada

Ingredientes para o recheio:

  • 300mL de creme de leite FRESCO
  • 2 colheres de chá de açúcar de confeiteiro
  • 1 pitada de sal
  • 50g de manteiga sem sal – amolecida
  • 200g de chocolate meio amargo – picado
  • 50mL de leite
  • 1 pitada de flor de sal

Coloque a farinha e a manteiga em uma vasilha e amasse e misture até atingir a consistência de farelo de pão. Faça isso o mais rápido possível para a manteiga não derreter. Caso prefira, use um processador de alimentos.

Coloque a água aos poucos, usando só o suficiente para a massa parar de esfarelar. Assim que atingir uma consistência firme, enrole em plástico filme e leve à geladeira por 15 minutos.

Aqueça o forno a 180°C. Retire a massa da geladeira e abra em uma superfície coberta de farinha. Ajuste-a em uma forma untada redonda de aproximadamente 23cm.

Cubra com papel manteiga, encha com feijões crus e asse por 15 minutos. Coloque vários grãos de feijão. A ideia é forçar a massa para baixo. Se você não usar os feijões, ela vai inchar e rachar.

Retire do forno, remova os feijões e asse novamente por 15 minutos ou até que a massa comece a ficar dourada.

Coloque o creme de leite, o açúcar e o sal em uma panela e ferva. Retire do fogo e adicione a manteiga e o chocolate. Misture até atingir uma consistência homogênea.

Após uns 5 minutos, misture o leite. Mexa bem. Coloque a mistura em cima da massa e deixe descansar por 2 horas, até ficar consistente. Caso prefira, deixe na geladeira.

Polvilhe a flor de sal por cima do tarte antes de servir. Lindeza!

Essa receita serve 6 pessoas.

Have you ever had chocolate with salt? It’s big in some places, but where I live it’s totally new. It might seem absurd at first, but think about it… salt is a flavor enhancer. The flavor of chocolate is amazing. So to enhance the taste of chocolate is pure magic! And you also make it really easy to eat, since it’s not too sweet. Believe me, chocolate with salt is just incredible!

This is a recipe by Jamie Oliver. I made it some time ago and had a problem with it because I switched the cream. So don’t make my mistake! This tart requires double cream (or heavy cream) and it can’t be replaced! Regular cream won’t get consistent with time, differently from the fatter version.

But that’s the only catch. The recipe is quite easy and turns out delicious! Have fun!

Ingredients for the short crust pastry:

  • 125g flour
  • 1 pinch of salt
  • 55g of butter – frozen and cut into cubes
  • 2 to 3 tablespoons of cold water

Ingredients for the filling:

  • 300mL of heavy cream
  • 2 teaspoons of caster sugar
  • 1 pinch of sea salt
  • 50g of unsalted butter – soft
  • 200g of bittersweet chocolate – chopped
  • 50mL of milk
  • 1 pinch of fleur de sel

Put the flour and butter in a bowl and mix until it reaches the consistency of bread crumbs. Do this as fast as you can, so the butter doesn’t melt. In case you have one, use a food processor.

Add water little by little, using just enough to make it less crumbly. As soon as it reaches a firm consistency, wrap it in cling film and take it to the fridge for 15 minutes.

Turn the oven on at 180°C. Remove the pastry from the fridge and open it on a flour covered surface. Set it on a 23cm greased tart tin.

Cover it with baking paper, fill it with uncooked beans and bake for 15 minutes. Add several grains, since the idea is keeping the pastry down. In case you don’t use enough, it will puff up and burst.

Remove the crust from the oven, take the beans out and bake again for 15 minutes or until the pastry starts turning golden.

Put the cream, sugar and salt on a pan and bring to boil. Remove it from the heat and add the butter and chocolate. Mix well until smooth.

After about 5 minutes, add the milk. Stir well. Pour the mixture on top of the crust and leave it to rest for 2 hours, until consistent. In case you prefer, keep it in the fridge.

Sprinkle with fleur de sel on top before serving. Gorgeous stuff!

This recipe serves 6 people.

Bolo de chocolate e laranja / Chocolate and orange cake

* Scroll down for the English version!

Na semana passada eu falei que pera e gorgonzola são uma dupla infalível. Junto com eles na Liga da Cozinha (rs), estão chocolate e laranja. Já comi barras de chocolate com raspinhas de da casca e já fiz trufas deliciosas com o sabor intenso de conhaque e o aroma incrível de laranja (aliás, é um post para o futuro!). Esse bolo entra para o páreo e não faz feio.

Um pouco mais denso do que um bolo tradicional, molhadinho e delicioso!

Encontrei a receita no site da BBC. O bolo foi feito por um participante do meu programa querido, The Great British Bake Off. Não sei quem foi, já que não vi essa temporada, mas espero que tenha ganhado uma pontuação incrível!

Ingredientes para o bolo:

  • 50g de chocolate meio amargo picado
  • 200g de açúcar de confeiteiro
  • 200g de manteiga sem sal amolecida (mais um pouco para untar)
  • Raspa da casca de 2 laranjas
  • Suco de 1 laranja
  • 5 ovos
  • 200g de farinha com fermento
  • 1 colher de chá de fermento em pó
  • 150g de cacau em pó

Ingredientes para a calda:

  • 150g de açúcar
  • 150ml de água
  • 1 dose de licor de laranja (não encontrei um licor de laranja que não fosse caríssimo e acabei usando limoncello. Ficou uma delícia!)

Ingredientes para o ganache:

  • 200ml de creme de leite fresco
  • 200g de chocolate meio amargo picado
  • 1 dose de licor de laranja (ou limoncello)

Aqueça o forno a 180°C e unte duas formas de 20cm (eu não tinha duas iguais e acabei fazendo dois bolos finos, um maior que o outro).

Derreta o chocolate em uma vasilha, tomando cuidado para não queimar. Reserve.

Bata o açúcar e a manteiga em uma vasilha até que a mistura fique aerada. Adicione as raspas de laranja, o suco de laranja e o chocolate derretido.

Adicione os ovos, um de cada vez, batendo bem a massa.

Misture a farinha, o fermento e o cacau e peneire os três em cima da massa úmida (eu não costumo peneirar a farinha, mas como o cacau costuma empelotar, achei melhor seguir à risca). Bata bem até que a mistura fique homogênea. A textura é bem mais seca que um bolo comum.

Divida a massa entre as duas formas e asse por 25 a 30 minutos, até que os bolos estejam assados (espete com um palito para conferir. Eles estão prontos se o palito sai limpo).

Enquanto os bolos assam, faça a calda. Aqueça o açúcar e a água em uma panela até que o açúcar derreta e o volume diminua. Acrescente o licor.

Retire os bolos do forno e deixe esfriar por 10 minutos. Faça pequenos furos nos bolos e derrame a calda, deixando o líquido ser absorvido. Espere que eles estejam frios e retire-os das formas.

Aqueça o creme de leite em uma panela. Retire do fogo antes de ferver. Adicione o chocolate e mexa até derreter e o ganache ficar homogêneo. Acrescente o licor.

Coloque um dos bolos no prato em que você vai servi-lo e espalhe metade do ganache em cima. Com cuidado, posicione o outro bolo por cima e espalhe o restante da mistura de chocolate.

Esse bolo serve 10 pessoas como lanche e 20 como sobremesa.

Last week I talked about how pear and blue cheese are a winning duo. Along with them in the Kitchen League (lol), are chocolate and orange. I’ve eaten chocolate bars with zest and make delicious truffles with the intense flavor of cognac and the amazing aroma of orange (which, by the way is a post for the future!). This cake enters the list and does a remarkable job.

A little more dense than a regular cake, it is also moist and delicious!

I found this recipe at BBC’s website. The cake was made by a participant of my dear show, The Great British Bake Off. I don’t know who did it, since I never watched this specific season, but I hope they got amazing scores!

Ingredients for the cake:

  • 50g of chopped bittersweet chocolate
  • 200g of caster sugar
  • 200g of unsalted melted butter (plus a bit more to grease)
  • Zest of 2 oranges
  • Juice of 1 orange
  • 5 eggs
  • 200g of self-raising flour
  • 1 teaspoon of baking powder
  • 150g of cocoa powder

Ingredients for the syrup:

  • 150g of sugar
  • 150ml of water
  • 1 dose of orange liqueur (I couldn’t find anything that wasn’t really expensive, so I ended up using limoncello. It turned out great!)

Ingredients for the ganache:

  • 200ml of double cream
  • 200g of chopped bittersweet chocolate
  • 1 dose of orange liqueur (or limoncello)

Heat up the oven at 180°C and grease two 20cm tins (since I didn’t have matching ones, I made one cake bigger than the other. They were a bit too thin, but it worked).

Melt the chocolate in a bowl, being very careful not to burn it.

Whisk the sugar and butter in another bowl until it turns fluffy. Add the orange zest, the juice and melted chocolate.

Mix in the eggs one at a time.

Combine the flour, baking powder and cocoa powder and sift the three of them over the moist mixture (I usually don’t bother with sifting, but since the cocoa powder has a tendency to turn lumpy, I thought I might as well just do it). Whip until the batter turns smooth. The texture is much drier than a regular cake.

Divide the batter into the 2 tins and bake for 25 to 30 minutes, until the cakes are baked (stick a toothpick in one. If it comes out clean, they’re ready).

While the cakes bake, make the syrup. Heat up the sugar and water in a pan until the sugar melts and the volume of the liquid reduces. Add the liqueur.

Remove the cakes from the oven and let them cool for 10 minutes. Make small holes on them and pour the syrup, letting the liquid be absorbed. Wait until they’re cold and remove them from the tins.

Heat up the cream on a pan. Remove it from the fire before it starts boiling. Add the chocolate and stir until it melts and the ganache turns smooth. Add the liqueur.

Put one of the cakes on the plate in which you will serve it and spread half the ganache on top. Carefully, position the other cake right on top and spread the rest of the chocolate mixture.

This cake serves 10 people as a snack and about 20 as dessert.

Mousse de iogurte e chocolate / Chocolate yogurt mousse

* Scroll down for the English version!

Sou chocólatra desde que me entendo por gente. Do tipo que não acalma enquanto não dá a primeira mordida em um pedaço de chocolate. E que sente a alegria percorrendo pelo corpo como uma corrente elétrica ao saborear essa maravilha. Do tipo que gosta mesmo é de chocolate meio amargo e tem pavor do branco (gente, se não tem cacau, não é chocolate, né?).

Normalmente não paro de comer chocolate nem quando faço dieta. Mas algumas ocasiões quando eu realmente testo a minha força de vontade, preciso de algo para combater as crises de abstinência. Essa receitinha simples é uma alternativa bacana :-)

Minha mãe faz um iogurte grego incrível. Vou fazer um post com a receita, é super simples. Mas fiquem à vontade para usar iogurte grego comprado. Outra opção é coar iogurte natural em um pano de prato. Tirando o excesso de soro, ele vai ficar mais cremoso.

Ingredientes:

  • 1 xícara de iogurte grego (caso ele venha adoçado, reduza a quantidade de açúcar a acrescentar. Se você usar o iogurte comum, coe 2 xícaras e com alguma antecedência)
  • 2 colheres de sopa de açúcar mascavo ou mel
  • 1 ½ colher de sopa de cacau em pó
  • 5 amêndoas cortadas em pedaços (fique à vontade para usar a castanha que quiser)
  • Cacau nibs e goji berry para enfeitar (caso você não tenha, use pedacinhos de amêndoas)

Só misturar tudo! Eu costumo servir gelado. O iogurte é tão cremoso e o sabor é tão incrível que você vai achar que está comendo sobremesa. Mas é saudável e super nutritivo. Eu como de lanche, café da manhã, sobremesa.. rs. Use a sua imaginação!

Essa receita serve 1 pessoa ou 2 que se amam.

—-

I’ve been a chocoholic for since I can remember. The kind that won’t settle down until takes the first bite at a piece of chocolate; that feels the joy running its course on the blood stream like an electric shock when savoring this treat; the kind of person who really likes bittersweet chocolate and is terrified of the white one (guys, come on, if there’s no cacao, it’s not chocolate, right?).
Usually I don’t stop eating chocolate even when I’m on a diet. But sometimes I test my will power for a while. And at those times, I need something to help contain the abstinence crises. This simple recipe is a great alternative :-)
My mother makes a killer Greek yogurt. I’ll make a post with the recipe pretty soon, it’s really simple. Feel free to use store bought, though. Another option is to strain regular yogurt using cheesecloth. Removing the excess water, it gets creamier.
Ingredients:
  • 1 cup of Greek yogurt (in case it comes sweetened, reduce the amount of sugar. If you use regular yogurt, strain 2 cups some beforehand)
  • 2 tablespoons of muscovado sugar or honey
  • 1 ½ tablespoons of cocoa powder
  • 5 chopped almonds (feel free to use any other nut)
  • Cacao nibs and goji berries to garnish (in case you don’t have some, use pieces of almonds)
Just mix everything! I usually serve it cold. The yogurt is so creamy and the flavor is so incredible that you’ll think you’re eating dessert. But it’s healthy and super nutritious. I eat it for breakfast, as a snack, dessert.. Just use your imagination!
This recipe serves 1 person or 2 people who really love each other.

Cupcake

* Scroll down for the English version!

Eu nunca fui uma garota do tipo que pira num cupcake. Bolo pequeno, bolo grande, bolo magro ou gordo, decorado ou simples… bolo é bolo ;-) Mas o bolinho realmente é prático e lindo. E eu curto um desafio, então resolvi experimentar.

Fiz um cupcake recheado de avelãs. Metade deles receberam cobertura de cream cheese e a outra metade, com ganache. E usei uns confeitinhos e forminhas lindos que a minha tia comprou. Olha que gracinha!

No fim das contas, acho que o ganache combina mais com o cupcake recheado. A cobertura de cream cheese da tia Martha é maravilhosa, mas ficaria melhor com um bolinho mais simples. Ou talvez seja eu transformando o bolinho em doce de adulto rs

Eu usei a receita do Food Network e fiz algumas adaptações.

Ingredientes:

  • 1 ½ xícara de farinha de trigo
  • 1 colher de chá de fermento em pó
  • 2 colher de chá de bicarbonato de sódio
  • ½ colher de chá de sal
  • 1 xícara de cacau em pó
  • 1 xícara de manteiga em temperatura ambiente
  • 1 xícara de açúcar mascavo
  • 1 xícara de açúcar cristal
  • 2 ovos
  • 1 xícara de buttermilk (como eu nunca achei buttermilk, usei uma mistura de ¾ de xícara de iogurte natural e ¼ de xícara de leite)

Não usei a recomendada ½ xícara de licor, porque eu não tinha. Licor de avelã ou de café funcionam bem.

Ingredientes para o recheio:

  • 1 xícara de avelãs
  • 6 colheres de sopa de pasta de avelã com chocolate

Ingredientes para a cobertura de ganache:

  • 300g de chocolate meio amargo picado
  • 1 xícara de creme de leite fresco

Ingredientes para a cobertura de cream cheese:

  • 200g de manteiga sem sal em temperatura ambiente
  • 200g de cream cheese em temperatura ambiente
  • 1 xícara de açúcar de confeiteiro

Aqueça o forno a 180°C. Coloque as forminhas de cupcake em uma travessa apropriada para bolinhos.

Misture a farinha, fermento em pó, bicarbonato de sódio e sal em uma vasilha. Reserve.

Junte a manteiga e os dois tipos de açúcar em uma vasilha e bata até atingir uma textura mais leve. Adicione os ovos, um de cada vez. Misture o buttermilk até incorporar bem.

Junte batendo suavemente a farinha e o cacau, alternando entre os dois e começando e terminando com a farinha. Reserve.

Bata as avelãs em um liquidificador até ficarem bem pequenas. Adicione a pasta de avelã e misture.

Encha ¼ das forminhas de cupcake com a massa. Coloque uma colher de chá de recheio em cada uma e cubra com o restante da massa, enchendo até ¾ da forma. É importante não encher muito, ou a massa vai crescer e vazar. Eu consegui fazer 12 cupcakes, mas a receita na qual eu me baseei diz que seriam 24. Acho que as minhas forminhas são um tanto grandes ;-)

Leve ao forno por 20 a 40 minutos. O importante é conseguir furar com um palito de dente e tirá-lo bem limpo. Tire-os do forno e deixe-os esfriar enquanto prepara as coberturas.

Para esse ganache, é importante usar creme de leite fresco, que muda de textura depois de batido e esfriado. Leve o creme de leite ao fogo por alguns minutos, até começar a ferver. Desligue o fogão e acrescente o chocolate. Mexa bem, até ficar homogêneo. Deixe o ganache esfriar por alguns minutos na geladeira e bata em uma batedeira. Volte com ele para a geladeira e tire alguns minutos depois, quando ele vai estar bem firme. Encha o saco de confeitar.

Para montá-lo, é só cortar a pontinha do saco, colocar a parte branca mais fina por dentro, a parte metálica por fora e enroscar a tampa branca por cima. Encha o saco com o ganache e brinque de enfeitar os cupcakes!

Para fazer a cobertura de cream cheese, bata a manteiga, cream cheese e açúcar em uma batedeira, até atingir um creme bem espesso e claro. Caso queira, adicione ¾ colher de chá de essência de baunilha.

Use o mesmo procedimento para encher outro saco de confeitar.

Decore os cupcakes com enfeitinhos, avelãs batidas ou deixe-os lindos como estão.

Essa receita rende 12 cupcakes.

I was never a cupcake girl. Small cakes, big cakes, thin cakes, thick cakes, decorated or simple ones… a cake is a cake ;-) But I have to admit that cupcakes are practical and cute. And I do like a challenge, so I decided to give them a try.
I made a hazelnut filled cupcake. Half of them got a cream cheese frosting and the other half, a ganache one. I sprinkled some candy on top and used the liners that my aunt bought. Look at these cuties!
In the end, I think that the ganache goes better with the hazelnut cupcake. The cream cheese frosting from aunty Martha is pretty awesome, but it would be better on a simpler cupcake. Or maybe I’m turning cupcakes into adult desserts…
I used Food Network’s recipe and made a few changes.
Ingredients:
  • 1 ½ cup of flour
  • 1 teaspoon of baking powder
  • 2 teaspoons of baking soda
  • ½ teaspoon of salt
  • 1 cup of cocoa powder
  • 1 cup of butter at room temperature
  • 1 cup of brown sugar
  • 1 cup of regular sugar
  • 2 eggs
  • 1 cup of buttermilk (since I didn’t find any, I used a mixture of ¾ cup of yogurt and ¼ cup of milk)
I didn’t use the recommended ½ cup of liqueur, because I didn’t have any. Hazelnut or coffee liqueur would work well.
Ingredients for the filling:
  • 1 cup of hazelnuts
  • 6 tablespoons of hazelnut chocolate paste
Ingredients for the ganache frosting:
  • 300g of bittersweet chocolate – chopped
  • 1 cup of heavy cream
Ingredients for the cream cheese frosting:
  • 200g of unsalted butter at room temperature
  • 200g of cream cheese at room temperature
  • 1 cup of confectioners’ sugar
Heat up the oven at 180°C. Put the cupcake liners on the muffin tins.
Mix the flour, baking powder, baking soda and salt. Set aside.
Whip the butter and two different kinds of sugar until you get a lighter texture. Add the eggs, one at a time, whipping well. Pour in and whip the buttermilk. Mix the flour and cocoa slowly, one bit at a time. Start and end with the flour. Set aside.
Blitz the hazelnuts on a blender until finely chopped. Add the hazelnut paste and mix well.
Fill ¼ of the liners with the batter. Add 1 tablespoon of the filling on each one and cover with the rest of the batter, filling ¾ of the liner. It’s important not to add too much, or the batter will rise and spill. I managed to make 12 cupcakes, although the original recipe said it would yield 24. I suppose my tins are quite big ;-)
Take them to the oven for 20 to 40 minutes. The important part is to be able to stick in a toothpick and removing it clean from the cakes. Remove them from the oven and let them cool while you make the frostings.
For the ganache, the important thing is using heavy cream, which changes texture after whipped and cooled. Heat the cream for a few minutes on the stove top until it boils. Turn the heat off and add the chocolate. Stir well, until smooth. Let the ganache cool for a few minutes in the fridge and whip for a while. Take it back to the fridge for a few minutes. It will be much more firm. Fill the piping bag.
To set it up, cut the tip of the bag and put the smaller plastic part inside. Put the metallic part on top and screw in the plastic lid. Fill in the bag with the ganache and play at decorating!
For the cream cheese frosting, whip the butter, cream cheese and sugar until you get a thick, light cream. If you want, add ¾ teaspoon of vanilla essence.
Use the same procedure to fill in another piping bag. Decorate the cupcakes with candy, chopped hazelnuts or let them shine as they are.
This recipe makes 12 cupcakes.

Rosca recheada com canela, chocolate e amêndoas / Cinnamon rolls with chocolate and almonds

* Scroll down for the English version!

Continuando a temporada de forno, hoje é dia de rosca!! Minha avó materna fez por muitos anos uma rosca de Natal deliciosa, com coco, frutas cristalizadas e muita calda. Lembro de pedir para colocar mais, sou do tipo de pessoa que acredita que recheio e calda nunca são demais. Mas como eu sou também chocólatra, me inspirei numa receita da Joy the Baker e fiz uma rosca recheada com chocolate. E ficou muito bom, olha!

O cheio da rosca assando é incrível… quem não quer uma casa cheirando à chocolate e canela?

Os passos são vários e um tanto demorados, mas bastante simples. E o resultado vale muito à pena!

Ingredientes para a rosca:

  • 2 xícaras de leite integral
  • ½ xícara de óleo
  • ½ xícara de açúcar cristal
  • 2 ¼ colher de chá de fermento biológico seco instantâneo
  • 4 ½ xícaras de farinha (mais farinha para polvilhar)
  • ½ colher de chá de fermento em pó
  • ½ colher de chá de bicarbonato
  • 2 colheres de chá rasas de sal

Ingredientes para o recheio:

  • 4 colheres de sopa de manteiga
  • ½ xícara de açúcar mascavo
  • Canela em pó a gosto
  • Raspa de 2 limões (usei limão capeta, super cheiroso!)
  • 1 xícara de amêndoas picadas e torradas
  • 170g de chocolate meio amargo picado

Ingredientes para a cobertura:

  • 1 ½ xícara de leite
  • 5 colheres de sopa de açúcar
  • 1 colher de chá de extrato de baunilha (usei a baunilha de verdade, só porque eu comprei na promoção rs)

Aqueça o leite, o óleo e o açúcar em uma panela grande no fogo médio até quase ferver. Deixe esfriar até ficar morno. Cuidado com essa temperatura, pois se o leite ficar quente demais, vai matar as leveduras que fazem a rosca crescer. A temperatura ideal é mais ou menos 40°C. Como eu não tinha um termômetro, conferi usando um dedo bem limpo rs. Jogue o fermento biológico por cima e deixe quietinho por 1 minuto.

Adicione 4 xícaras de farinha no leite e misture bem. Cubra com uma tampa ou com plástico-filme e deixe a levedura fazer a sua mágica por 1 hora. Eu coloquei dentro do forno desligado, só para a massa ficar quentinha e não tomar vento. Depois dos primeiros 30 minutos, confira se a ela está crescendo. Após 1 hora, ela deve estar bem maior. Destampe e adicione o bicarbonato, o sal, o fermento em pó e ½ xícara de farinha e misture bem.

Aqueça o forno a 180°C. Unte duas formas redondas de 20cm ou um tabuleiro retangular maior. Prepare os recheios, picando o chocolate, raspando o limão e picando e torrando as amêndoas.

Eu não tinha espaço suficiente para abrir a massa toda de uma vez (a Joy também não. Afinal, quem tem?), então o jeito é fazer metade da massa e repetir o processo. Abra a primeira metade em forma de um retângulo. Use a farinha para evitar que a rosca grude por toda parte.

Espalhe metade da manteiga em cima. Polvilhe de forma bem homogênea a canela e metade do açúcar, do chocolate, da castanha e da raspa de limão.

Com muito cuidado, role a massa na sua direção, apertando suavemente para fechar bem. Eu descartei mais ou menos 1cm de cada lado, que ficaram com pouco recheio. Divida o restante em 8 partes iguais e arrume nas formas. Repita o processo com a outra metade da massa. Deixe os rolinhos descansarem por 15 minutos.

Asse na parte superior do forno, até a massa ficar dourada. No forno da Joy, demorou 20 minutos, mas no meu, quase 1 hora. Acho que o meu é realmente bem fraquinho… rs O importante é o marrom dourado da parte de cima. E o cheiro maravilhoso!

Enquanto a massa assa, faça a calda. Ferva o leite com o açúcar e a baunilha.

Retire as roscas do forno e derrame a calda por cima, até absorver bem. Quem vai comer uma só?

Essa receita serve 16 roscas.

Next in our baking season are some delicious cinnamon rolls! My grandma from my mother’s side made for several years a delicious roll filled with coconut, crystalized fruit and lots of glaze. I remember asking her to add more, since I’m the kind of person who believes that filling and glaze are never too much. And since I’m also a chocoholic, I got inspired by Joy the Baker‘s recipe and made a roll with loads of chocolate. And it tasted pretty awesome!
The smell of rolls baking in the oven is just amazing… who doesn’t want their house to smell like chocolate and cinnamon? The steps are several and they take a while, but everything is pretty straight forward. And the result is so worth it!
Ingredients for the roll:
  • 2 cups of whole milk
  • ½ cup of oil
  • ½ cup of granulated sugar
  • 2 ¼ teaspoon of active dry yeast
  • 4 ½ cups of flour (plus some extra to dust)
  • ½ teaspoon of baking powder
  • ½ teaspoon of baking soda
  • 2 shallow teaspoons of salt
Ingredients for the filling:
  • 4 tablespoons of butter
  • ½ cup of brown sugar
  • Cinnamon powder to taste
  • Zest of 2 limes
  • 1 cup of chopped toasted almonds
  • 170g of chopped dark chocolate
Ingredients for the glaze (can I call this a glaze?? lol):
  • 1 ½ cup of milk
  • 5 tablespoons of sugar
  • 1 teaspoon of vanilla extract (I used a real vanilla pod, just because I found some on sale)
Warm the milk with the oil and sugar on a big pot at medium heat just below the boiling point. Let it cool until the milk is warm, about 40°C. It’s important that the milk is not too hot, or the yeast will all die and the dough won’t rise. As I didn’t have a thermometer, I used a clean finger to check the temperature ;-) Put the yeast on top of the milk and let it sit there for 1 minute.
Add 4 cups of flour to the milk and mix well. Cover the dough with the lid of the pan or with a plastic wrap and let the yeast make its magic for 1 hour. I stored it inside the oven (which was off), just so the dough was cozy and warm. Check after 30 minutes to see if it’s rising. After 1 hour, the dough should be bigger. Take the lid or plastic off and add the baking soda, baking powder, salt and ½ cup of flour. Mix well.
Turn the oven on to 180°C. Grease two round 20cm tins or a bigger rectangular tray.
I didn’t have enough space to open the whole dough at once (Joy didn’t either. Actually, who does?), so the way to do this is to make half at a time.
Open half the dough in the shape of a rectangle. Use the flour to avoid it to stick everywhere.
Spread half the butter on top. Sprinkle the cinnamon and half the sugar, chocolate, almonds and lime zest.
Carefully, roll the dough towards you, squeezing lightly to shut it well. I discarded 1cm on each extremity, which had little filling. Divide the rest in 8 equal parts and arrange them in the tins. Repeat the whole process with the other half of the dough. Let the rolls rest for about 15 minutes before baking them.
Bake on the superior part of the oven, until the rolls are golden. Joy’s oven is much better than mine, since she baked her rolls in 20 minutes and it took mine about 1 hour. The important part is getting the top golden and the smell delicious!
While the rolls bake, boil the milk with the sugar and vanilla.
Remove the rolls from the oven and pour the glaze on top, until it absorbs everything. Now come on, who wants to eat only one??
This recipe makes 16 rolls.

Cookies com gotas de chocolate / Chocolate chip cookies

* Scroll down for the English version!

Cookies são irresistíveis. Criados há centenas de anos e espalhados pelo mundo principalmente pela cultura americana, podem ser preparados de várias formas e ter milhares de sabores diferentes.

Infelizmente (ou felizmente para a nossa silhueta), cookies ainda não são um hit tão grande no Brasil. Talvez por que as pessoas não saibam quão fácil é fazê-los em casa. E garanto a vocês, não há mistério algum em atingir aquela textura crocante por fora, macia por dentro e o sabor doce e amanteigado. Maravilha!

Quando faço cookies, sempre lembro do filme “Mais estranho que a ficção”, que recomendo demais. Atores sensacionais, diálogos muito bem pensados e uma narração maravilhosa. Uma das personagens é confeiteira e faz cookies maravilhosos. Ela tira uma forma do forno e mergulha os cookies ainda quentes no leite. Nham!

A minha cena favorita (alerta de SPOILER!!) é quando o personagem do Will Ferrell quer agradar a moça e entrega a ela uma cesta de farinhas. O que é lindo sobre isso e que não faz o menor sentido em português, é que as palavras para flor e farinha soam quase idênticas e ele fez um jogo de palavras adorável e super romântico. “Eu trouxe farinhas para você” é um truque que funcionaria comigo fácil, fácil ;-)

Romantismos e filmes incríveis à parte, resolvi compartilhar com vocês a receita tradicional da Martha Stewart para cookies com gotas de chocolate e contar umas possíveis alterações. Dei pacotinhos de cookies de presentes para a minha família no Natal. Essas belezinhas de papel craft são criações da minha mãe gênia, que fez as etiquetas também. Quem não gostaria de ganhar um saquinho lindo desses?

Vamos à receita!

Ingredientes:

  • 2 ¼ xícaras de farinha
  • ½ colher de chá de bicarbonato de sódio
  • 1 xícara de manteiga sem sal em temperatura ambiente (usei manteiga normal e adicionei menos sal no final). Caso queira um sabor diferente, troque metade da quantidade por manteiga de amendoim. Fica uma delícia!
  • ½ xícara de açúcar cristal
  • 1 xícara de açúcar mascavo
  • 1 colher de chá de sal
  • 2 colheres de chá de extrato de baunilha
  • 2 ovos
  • 2 xícaras de gotas de chocolate meio amargo (usei barras de chocolate e piquei em pedaços)

Aqueça o forno a 180°C. Misture a farinha e o bicarbonato em uma vasilha. Em outro recipiente, bata a manteiga e os dois tipos de açúcar – usando uma batedeira – até atingir uma textura mais consistente e uma cor mais clara.

Adicione o sal, a baunilha e os ovos e bata mais um pouco. Junte a farinha e misture até ficar homogêneo.

Adicione o chocolate e mexa bem.

Prepare alguns tabuleiros cobrindo-os com papel manteiga e espalhe pedaços da massa do tamanho de uma colher de sopa. Deixe um espaço de uns 5cm entre cada.

A Martha diz para assar por 8’ a 10’, mas no meu forno demorou bem mais. O segredo é conferir se os cookies estão com as bordas douradas (o meio ainda estará macio). Cuidado para não deixar queimar!

Eles são deliciosos ainda quentes, o centro macio e as gotas de chocolate derretidas. Pura poesia… Mas caso não vá comer na hora (e eu admiro o seu auto controle), deixe esfriar por um tempo antes de guardar em recipiente fechado. Eles duram aproximadamente uma semana.

Essa receita rende mais de 30 cookies. Desafio vocês a comer um só ;-)

– Como eu disse antes, existem várias receitas diferentes. Fiz uma versão desta usando umas 3 colheres de cacau e aumentando o açúcar em mais 5 colheres. Coloquei flor de sal em cima dos cookies antes de levar ao forno. Ficou bom demais!


Cookies are irresistible. Created hundreds of years ago and spread around the globe mainly by the American culture, they can be prepared in several different ways and come in so many different flavors.
Unfortunately (or fortunately for our figure), cookies are not that much of a hit in Brazil. Maybe because people don’t realize just how easy it is to make them at home. And I guarantee that there’s no mystery in making that cookie that is crispy on the outside, chewy on the inside, sweet and buttery. Just wonderful!
Whenever I make cookies, I always remember the movie “Stranger than fiction”, which I highly recommend. Great actors, well thought dialogues and amazing narrator. One of the characters is a baker and she makes amazing cookies. She takes them of the oven and dips them still hot in the milk. Yum!
My favorite scene (SPOILER alert!!) happens when Will Ferrell’s character wants to be nice to the girl and gives her a bunch of different types of flour. The cute thing is that he says, in a really awkward way: “I brought you flours”. It’s just too darn adorable! Let me tell you that it would work on me like a charm!
Romanticism and amazing movies apart, I decided to share with you the traditional recipe that Martha Stewart makes for chocolate chip cookies and tell you what I do differently. I gave little packs of cookies for my family last year on Christmas. These craft paper beauties are my genius mother’s creation. Oh, and she also made the labels. I mean, who wouldn’t want to get one of these?
So let’s get down to it! Baking time!
Ingredients:
  • 2 ¼ cups of flour
  • ½ teaspoons of baking soda
  • 1 cup of unsalted butter at room temperature (I used regular butter and added less salt at the end). In case you want a nutty flavor, switch half of this for peanut butter. Delicious!
  • ½ cup of granulated sugar
  • 1 cup of brown sugar
  • 1 teaspoon of salt
  • 2 teaspoons of vanilla extract
  • 2 eggs
  • 2 cups of bittersweet chocolate chips (I chopped 2 bars)
Preheat the oven at 180°C. Mix the flour and the baking soda and set aside. In another bowl, whip the butter and the two types of sugar using an electric mixer until the mixture gets more consistent and clear.
Add the salt, vanilla and eggs and stir some more. Join in the flour and mix until smooth.
Add the chocolate chips and mix well.
Have a few trays ready, covering them with parchment paper. Spread dollops of dough about the size of a tablespoon, making sure you leave 5cm of space between them.
Martha tells us to bake them for 8’ to 10’, but it took much longer than that in my oven. The secret is to check if the sides are turning golden (the middle will still be soft). Careful not to let them burn!
They are so delicious while still warm. The chewy center, the melted chocolate chips… Pure poetry. But in case you’re not eating them immediately (and I applaud your self-restraint), let them cool for a while before storing them in an airtight container. They’ll keep for a week.
This recipe makes more than 30 cookies. I dare you too eat only one ;-)
– As I said before, there are several recipes. I made a slightly different one adding 3 tablespoons of cocoa powder and increasing the sugar by 5 tablespoons. I sprinkled some fleur de sel on top of the cookies before taking them to the oven. They turned out so good!

Tiramisu

* Scroll down for the English version!

Tiramisu é uma sobremesa italiana. Eu costumo chamar de “doce de gente grande”, já que não é toda criança que curte queijo e café na sobremesa ;-)

Acho bem triste que apesar de ter família italiana, nunca ouvi falar de uma receita tradicional de tiramisu na minha família. Talvez seja uma questão regional ou talvez ela tenha se perdido no tempo. Seja como for, a partir do momento que aprendi a fazer, nunca mais larguei. Sou do tipo que prefere um doce com mais personalidade e menos açúcar e o tiramisu é perfeito nos dois critérios. Além de fácil e delicioso!

Há anos procuro a receita perfeita. Já vi gente usando banana, ricota e diferentes bebidas, coisas que levantariam os cabelos da nuca dos italianos mais conservadores. E pior, nunca consegui usar mascarpone, já que o bendito queijo delicioso é tão caro no Brasil. Quem sabe um dia? Segue então uma receita modificada da Wishful Chef que eu achei que parece bem autêntica e é deliciosa!

Dobrei a receita para servir na ceia de Natal, mas vou colocar as quantidades originais aqui.

Ingredientes:

  • 225g de queijo mascarpone ou cream cheese
  • 12 biscoitos champagne (1 pacote)
  • 2 gemas de ovo
  • 2 colheres de sopa de açúcar
  • 60mL de café forte adoçado e frio
  • 1 ½ colheres de sopa de rum
  • 1 a 2 colheres de sopa de cacau (não é chocolate em pó)
  • Chocolate raspado para enfeitar (opcional)

Em uma vasilha, misture as gemas, o açúcar e metade do rum, batendo bem. Adicione o cream cheese bem devagar, colher por colher, deixando a mistura bem homogênea (bata na mão ou use uma batedeira).

Em um prato fundo, junte o café e o resto do rum. Mergulhe rapidamente cada um dos biscoitos e faça uma camada na vasilha em que for servir. A receita original pede para evitar que os biscoitos fiquem muito úmidos, ou vão começar a derreter. Minha mãe adora quando isso acontece. Caso prefira um tiramisu bem molinho, aumente a quantidade de café e rum e mergulhe por mais tempo.

Cubra os biscoitos com 1/3 da mistura de queijo e repita o procedimento com o resto dos ingredientes.

Cubra com plástico filme e deixe na geladeira por pelo menos 4 horas. Antes de servir, polvilhe cacau por cima, usando uma peneira.

Caso queira, coloque também as raspas de chocolate (usei um mandolim para fazê-las).

Essa receita serve de 4 a 5 pessoas.

—-

Tiramisu is an Italian dessert. I like to call it “grown-up dessert”, since not all kids enjoy cheese and coffee with their sweets ;-)
I think it’s quite sad that despite coming from an Italian family, I’ve never heard of a traditional tiramisu recipe in my family. Perhaps it’s a regional thing or maybe it got lost in time. Be it as it may, from the moment when I first learned to make it, I never stopped. I’m the kind of person who likes a dessert with personality and less sugar and tiramisu does great on both criteria. Besides being delicious and easy to make!
I’ve been looking for the perfect recipe for years. I’ve seen people using bananas, ricotta cheese and different kinds of booze, all things that would lift up the hair on the back of Italians’ head. And worse of all, I’ve never been able to use mascarpone, since the darling delicious cheese is so damn expensive in Brazil. Maybe one day? So here goes a slightly changed recipe from Wishful Chef, which I thought sounded quite authentic and tastes delicious!
I double the recipe to serve on Christmas Eve, but I’ll leave the original amounts here.
Ingredients:
  • 225g of mascarpone cheese (or cream cheese)
  • 12 ladyfingers
  • 2 egg yolks
  • 2 tablespoons of sugar
  • 60mL of strong coffee (sweetened and cold)
  • 1 ½ tablespoons of rum
  • 1 to 2 tablespoons of cocoa powder
  • Chocolate shavings (optional)
Whip the egg yolks, sugar and half the rum in a bowl. Add the cheese slowly, one spoon at a time. Whip well until the mixture is smooth.
On a deep plate, stir the coffee and the rest of the rum. Dip each of the ladyfingers quickly and make a layer on the dish you’re using to serve. The original recipe tells you to avoid the biscuits to get soaked, or they will start melting. However, my mother loves when that happens. So if you want a really moist tiramisu, use more coffee and rum on your biscuits.
Cover the ladyfingers with 1/3 of the cheese mixture and repeat the process with the rest of the ingredients.
Cover with cling film and leave it in the fridge for at least 4 hours. Before serving, sprinkle cocoa power on top, using a sieve. If you want, add the chocolate shavings (I used a mandolin to make them).
This recipe serves 4 to 5 people.

Bolo de chocolate e coco / Chocolate coconut cake

* Scroll down for the English recipe.

Fiz esse bolo em setembro e guardei o post para a época de festas. O bolo, é claro, acabou no dia seguinte. A ocasião era o aniversário da minha avó materna. A de origem libanesa, linda de morrer, lembra? A família dela veio para o Brasil há anos e se estabeleceu em Lavras, no interior de Minas Gerais. Desde cedo, quebrou barreiras. Teve uma carreira incrível, foi a primeira mulher da cidade a andar de bicicleta, viajava de jipe com os colegas de trabalho para cima e para baixo, derrubou um cara com um golpe de jiu jitsu (ela tem uma foto que prova isso) e pediu o meu avô em casamento. Não é sensacional?

Em homenagem a ela, escolhi fazer um bolo de coco e chocolate, duas paixões que ela nutre desde sempre. De bônus, olha a aniversariante soprando as velinhas ;-)

Usei uma receita linda do food52 e mudei uma coisinha ou outra.

Ingredientes:

  • 500g de chocolate meio amargo – picado
  • 2/3 xícara de manteiga
  • 4 ovos
  • 2 colheres de chá de essência de baunilha
  • 1 1/2 xícara de café forte
  • 3 1/3 xícaras de açúcar
  • 3 xícaras de farinha
  • 1 1/2 colher de chá de bicarbonato de sódio
  • 1 colher de chá de sal
  • 250g de cream cheese (amolecido fora da geladeira)
  • 1 xícara de coco ralado (sem adoçar)
  • 1 xícara de creme de leite

Ligue o forno a 180°C. Derreta 250g do chocolate com a manteiga a fogo baixo (ou no microondas). Deixe esfriar.

Misture o cream cheese com 1 ovo, 1/2 colher de chá de baunilha, 1/3 xícara de açúcar e o coco. Reserve.

Em outra vasilha, junte o chocolate com manteiga, 3 ovos, 1 1/2 colher de chá de baunilha e o café.

Misture o açúcar, farinha, bicarbonato e sal. Adicione a mistura de chocolate até ficar homogêneo. Evite bater a massa nesse momento, misturando com cuidado.

Derrame a metade da massa em uma forma untada de 30cm. Coloque a mistura de coco e cream cheese por cima gentilmente e por cima, o restante do bolo.

Asse por 45’ a 65’ ou até conseguir enfiar um palito no centro e ele sair limpo. Deixe o bolo esfriar por pelo menos 10’ antes de tirar da forma e colocar no prato onde vai servir.

Enquanto o bolo esfria, leve o creme de leite ao fogo baixo com o restante do chocolate, mexendo sempre. Desligue quando o creme de leite ferver e misture até incorporar bem. Quando o bolo estiver frio, derrame o creme por cima.

Essa receita serve de 10 a 12 pessoas.


I made this cake in September and saved the post for the holiday season. The cake, of course, was over the next day. The occasion was my grandma’s birthday. The one from my mother’s side, the gorgeous lebanese descendant, remember? Her family came to Brazil years ago and settled in Lavras, a town in the countryside. From an early age, she broke barriers. She had and amazing carrier, she was the first woman of the town to ride a bike, she travelled by jeep with her male colleagues all over the place, she knocked a guy down with jiu jitsu (she has a picture of it as proof) and she proposed to my grandpa. How amazing is that?
In her honor, I decided to make a coconut chocolate cake, since both ingredientes have been a passion since forever. As a bonus, here is the birthday girl blowing up the candles ;-)
I used a beautiful recipe from food52 and changed a thing or two.
Ingredients:
  • 500g bittersweet chocolate – chopped
  • 2/3 cup of butter
  • 4 eggs
  • 2 teaspoons of vanilla essence
  • 1 1/2 cup of strong coffee
  • 3 1/3 cups of sugar
  • 3 cups of flour
  • 1 1/2 teaspoon of baking soda
  • 1 teaspoon of salt
  • 250g cream cheese (softened outside the fridge)
  • 1 cup of shredded coconut (unsweetened)
  • 1 cup of cream
Turn the oven on to 180°C. Melt 205g of chocolate with the butter at low heat (or use the microwave). Let it cool for a while.
Mix the cream cheese and 1 egg, 1/2 teaspoon of vanilla essence, 1/3 cup sugar and the coconut. Set aside.
In another bowl, add the chocolate mixture with 3 eggs, 1 1/2 teaspoon of vanilla and the coffee.
Mix the sugar, flour, baking soda and salt. Add the chocolate mixture until incorporated. Don’t whip, just mix the ingredients with care.
Pour half the dough on a 30cm greased tray. Spread the coconut with the cream cheese on top and then pour the rest of the cake.
Bake it for 45’ to 65’ or until you can insert a toothpick in the center and it comes out clean. Let the cake cool down for at least 10’ before removing it from the tray and putting it on the serving plate.
While it cools down, take the cream and rest of the chocolate to a pan on low heat, stirring often. When the cream starts boiling, turn it off and mix well until smooth. Once the cake has cooled, pour the frosting on top.
This recipe serves from 10 to 12 people.